External wall insulation in Wakefield
External wall insulation in Wakefield
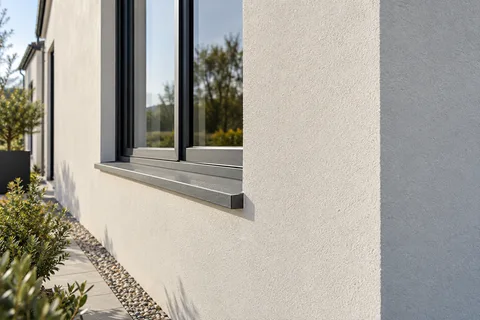
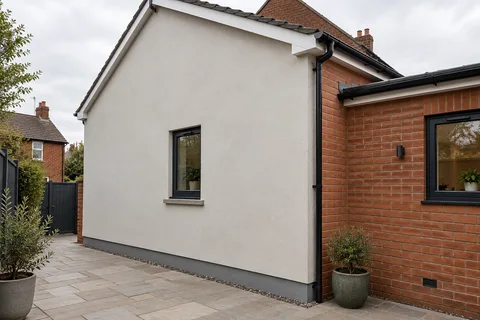
External wall insulation, or EWI, wraps the outside of a solid wall in insulation boards and finishes them with render. It is mainly for houses with solid walls that cannot take cavity insulation. From the street the result looks like a freshly rendered house, but the wall is now noticeably thicker, so every sill, pipe, vent and roof edge has to be rethought.

On this page
What goes on the wall
Structherm's NSC2 system is a useful example of the layers. Insulation boards, which can be expanded polystyrene, mineral wool, PIR or phenolic, come in 1200 x 600mm sheets in a range of thicknesses. They are fixed to the wall with proprietary fixings, nominally six to eight per square metre depending on the wall. A first coat of polymer-modified base render, 2–3mm thick, goes over the boards with glass-fibre mesh embedded in it, then a second base coat brings the total to 4–6mm. A finish goes on top: acrylic, silicone, dash or a brick-effect render.
Thickness matters. The insulation is usually much thicker than any render, so the finished face can end up well beyond the old one. That changes how the wall meets windows, doors, the roof and the ground.
Survey the wall, fix any damp or structural problems and remove loose render.
Take off downpipes, vents, lights and other fittings, and arrange for meters and services to be moved where needed.
Fix a starter track above the DPC and bond the insulation boards to the wall.
Mechanically fix the boards with insulation fixings suited to the wall.
Apply the first base coat and bed glass-fibre mesh into it, with extra mesh at opening corners.
Apply the second base coat, then primer and the finish.
Fit extended sills, trims and eaves details, and refit fittings on brackets that reach through the insulation.
- Existing wall Prepared; fittings removed and the base track fixed above ground level.
- Insulation boards Bonded with adhesive and, in most systems, mechanically fixed to the wall.
- Basecoat with mesh Reinforcement mesh embedded across the board joints and around openings.
- Primer Where the system requires it.
- Finish render A thin-coat finish that weatherproofs the insulation.
Wall on the left, finish on the right. Not to scale: coats, thicknesses and primers follow the chosen manufacturer’s system and the condition of the wall.
The details that make or break EWI
Window sills are the first. The old sills will no longer project far enough to throw water clear, so extended sills or new over-sills are fitted. Reveals are lined with thinner insulation where there is room, or the frame position is reconsidered if windows are being replaced. At the eaves, the insulation has to tuck under the existing roof overhang or the overhang has to be extended, or rain will run behind the top of the system. At the base, the system starts on a track or bell-cast detail above the DPC.
Everything fixed to the wall has to be dealt with: downpipes on longer brackets, extended vents and flues, satellite dishes, lights, alarm boxes, gates and washing-line posts. Meter boxes and service pipes may need a utility company. A good survey lists every item before the boards are ordered.
Is it right for your wall?
EWI suits a solid brick or block wall that is structurally sound, reasonably dry and not covered in features you want to keep. It is harder on traditional stone and lime-built houses, which rely on drying out through the face; Historic England's guidance on EWI and the SPAB both stress the moisture risks for older walls, and Approved Document L says traditional walls should only be improved where it will not cause long-term deterioration. In the Wakefield district, where conservation-area appraisals for places such as Ossett and Horbury describe sandstone as the main walling material, that is a real constraint.
There is also a regulatory trigger. Approved Document L counts adding a new external render layer as renovating it, and where more than half of that wall, or more than a quarter of the house's envelope, is being re-rendered, the guidance expects the wall to be upgraded if that is technically, functionally and economically feasible. Confirm the position with building control. So a planned re-render is often the moment the EWI question comes up.
Planning, weather and care
The government's permitted development guidance treats solid wall insulation as an improvement to a house, but cladding a house with render in a conservation area is not permitted development, and EWI changes the look of the walls. Check with the council first, particularly in one of the district's conservation areas. Structherm's base coat guidance gives the working limits of its system: no work below 5°C or above 35°C, render protected from rain for at least 48 hours, and no water from downpipes, sills or scaffolding thrown onto setting render. After handover, treat the walls with care: a drill through the finish into soft insulation needs the right fixings, so keep the system details for later work.
Common questions
Should window replacement be discussed before an EWI design?
Yes. Moving the frames outward into the insulation layer can make the reveals and sills much simpler, so it is easier to decide both together.
Can EWI go over old render?
Sometimes, if the old render is sound and the system maker accepts it as a background. Loose or hollow render is removed first so the boards are fixed to a solid wall.
See housing and planning information for Wakefield and nearby places, including the source and geography behind each figure.