Wall rendering in Wakefield
Wall rendering in Wakefield
Wall rendering covers a single face rather than the whole house: a gable end, a side wall that takes the weather, a new extension, or a freestanding garden or boundary wall. The build-up is the same as on a house, but a one-wall job lives or dies on where it stops, how it meets the surfaces that stay, and how its top and bottom shed water.

On this page
When rendering one wall is the right job
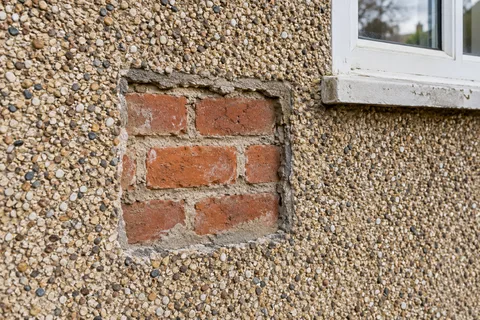
A single wall is often the one that faces the prevailing weather, a gable that was patched over the years, or new blockwork on an extension that has to be finished before it can be left. It can also be a choice: rendering one face to tidy up mismatched brick or old repairs. One-wall work makes sense when the problem really is confined to that face. If the tap test shows hollow render running round the corner onto the next elevation, stopping at the corner leaves a loose edge right beside the new work, and the job needs to grow.
The build-up depends on the finish. On a brick or block wall taking a thin silicone finish, a base coat with bedded mesh goes on first; K Rend's HP12 base coat, for example, is applied at a nominal 4–6mm and needs mesh at stress points such as reveals. A sand-and-cement render goes on as a scratch coat and a floated top coat. A through-coloured scraped render is thicker again. The finished thickness matters on a one-wall job because it decides how far the new face stands proud of the walls and sills around it.
Photograph the wall from both corners and from the street.
Tap-test the face and the neighbouring surfaces at each edge.
Strip or prepare the face and repair the masonry.
Fix stop beads at the edges, a bell-cast bead at the base and corner beads on returns.
Apply the base coat with mesh, then the finish coat in one session.
Check the coping, sill and base details once the scaffold or tower is down.
- Set the edges Decide where new render stops against brick, stone or an existing finish.
- Prepare the background Remove loose material, repair masonry and prepare suction and surface key. Existing paint needs a specified removal or alternative treatment.
- Base coat Built up to level the wall, with mesh where backgrounds change or crack.
- Finish Matched to the rest of the house or chosen as a deliberate contrast.
- Shed the water Copings, sills and the base bead keep rain off the top and away from the bottom edge.
The usual order of work. The survey and the chosen products decide the actual steps.
Where the new render stops
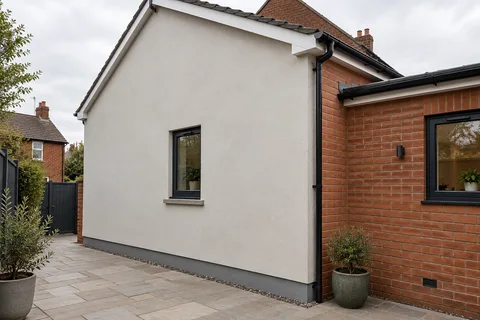
A clean stop is a bead, not a feathered edge. Where the new render meets brick or stone that is staying, a stop bead gives a straight, protected edge that can be sealed against the brick. On a gable, the render usually returns a short way round the front corner to a natural break such as a downpipe or the edge of a bay, rather than ending exactly on the arris where it would be knocked and would crack. Corner beads keep external angles straight and stop them chipping.
The base and the top need as much thought as the face. A bell-cast bead above the DPC throws rainwater clear of the brickwork below; Catnic describes its bell-cast bead for exactly that use at DPC level and over openings. At the top of a gable, the render meets the verge or bargeboard and has to finish neatly beneath it, not trap water against it. On a single-storey extension, the junction with the house wall and the flashing at the roof edge are where leaks show first.
Garden and boundary walls
A freestanding wall gets wet from both sides and from the top, so it behaves differently from a house wall. Render on one side only can trap moisture in the masonry, and a flat top with no coping lets rain straight into the core. A coping that overhangs both faces with a drip underneath, a damp-proof course beneath it and render that stops above the ground give a garden wall a much better chance. If the wall is leaning or the masonry is cracked through, it needs rebuilding before it is rendered, because render will not hold a moving wall together.
Check who owns a boundary wall before planning work on it. Rendering the face that looks onto a neighbour's garden may need their agreement, and the scaffold or tower may have to stand on their side.
Matching the rest of the house
New render beside old will not match perfectly on day one. Weathering, dirt and earlier coatings shift the colour of an existing finish, and texture is harder to match than colour. You have three honest options: accept a visible difference on a secondary wall, choose a deliberate contrast so the new face reads as intentional, or recoat the neighbouring elevations so they share one finish. A sample panel viewed in daylight beside the old render shows which you are dealing with.
Weather affects a single wall as much as a whole house. Fresh render should not go on in frost, heavy rain or hot drying wind, and a south-facing gable in summer may need shading so the finish does not dry too fast and craze.
Common questions
Can I render just the gable and leave the front as brick?
Yes, and many houses are finished that way. The key details are a stop bead where the render meets the front brick, a sensible return around the corner and a bell-cast bead above the DPC.
Should a garden wall be rendered on both sides?
Where possible, yes, with a proper coping on top. Rendering one face of a freestanding wall and leaving the top open can hold moisture in the masonry and push the render off.
See housing and planning information for Wakefield and nearby places, including the source and geography behind each figure.